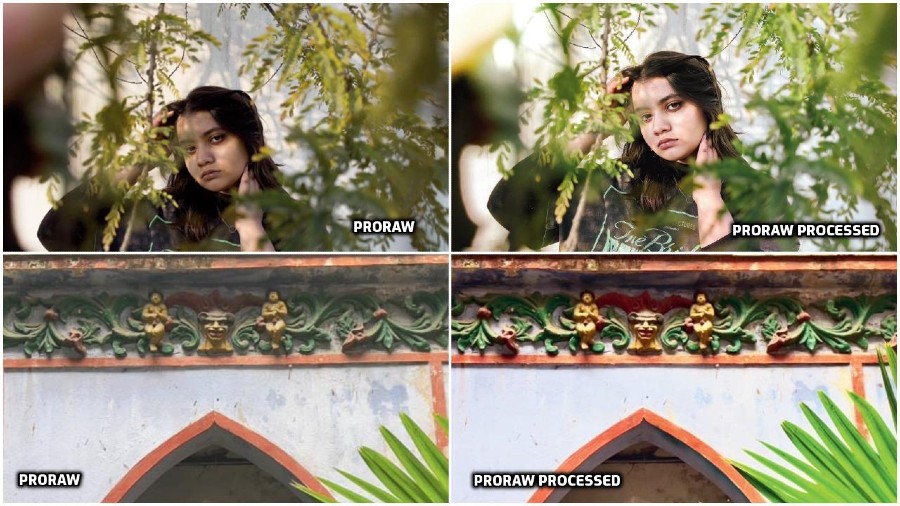
When you take a photo with an iPhone, think of a chef residing inside the camera module, chopping, stirring, tossing ingredients to make a droolworthy photo suitable for Instagram or something like it. You may not like too much turmeric or maybe want an extra dash of paprika. It’s impossible to tell the camera how to mix the ingredients as it has a brain of its own; only things like salt and pepper — think of it as contrast, brightness and so on — can be adjusted. But when put on a chef’s apron, the output will be as per your taste. That, in a weird way, explains Apple’s ProRAW picture format, which combines the information of a standard RAW format along with iPhone image processing to offer additional creative control when you make adjustments to exposure, colour and white balance. It’s one of the big steps Apple has taken to take smartphone photography to a new high. The result is for you to see on the iPhone 12 Pro and iPhone 12 Pro Max.
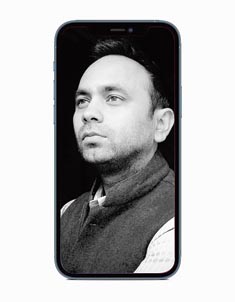
We caught hold of ace photographer Rohit Vohra, who is a whiz with the iPhone and has been using ProRAW. He shared with us the pros of the format, especially for pro shutterbugs. “I have been using the iPhone more, especially now when we spend more time indoors. The phone is always with you and makes for a great tool to take those candid family photos. I can’t wait to travel and shoot more with this beast,” he said. Here’s more from Vohra.
Taking iPhone photography to a different level
Honestly, my first reaction was: “Hell yes!” It’s something iPhone users had been waiting for a long time. Third-party Raw has been available for some time but there is something about the flexibility of having the option to take Raw images through the native camera app. This had been missing and iPhone users have welcomed this move. Don’t get me wrong, jpegs straight out of camera are delightful but ProRAW gives more flexibility in the editing process and enriches the work flow. ProRAW takes iPhone photography to a different level. It covered everything that one could ask for, Raw + Apple’s computation, who could ask for more.
Noise reduction algorithms vs ProRAW
ProRAW, unlike third-party Raw already available in the market, gives the user Apple’s computational help. So you do get an already clean file, but these files are built from multiple frames and this enables the end user to use the best parts of those photos in editing. Hence you do get more flexibility in controlling some noise reduction and preserving those details.
In tricky light situations
To understand this you have to know that unlike the classic raw format in cameras where images are saved directly by bypassing the processors computing IQ. Apple’s ProRaw creates hybrid Raw files which are rich with all the computation photography information. Now this comes in handy in processing photographs taken in tricky light conditions. With the help of ProRAW the user can retrieve all the information from shadows and highlights, which in turn gives the photographer more dynamic range to work with and create stunning images.
Better colour representation in photographs
Apple ProRAW files are 12-bit Raw DNG with 14 stops of dynamic range. It captures much more colour information, much more light information compared to other Raws or jpegs. The image quality is fantastic and is noticeably better than both jpeg, Heic or other Raws. If you are super picky about how your images look, you can take this extra step in editing to get the desired colours with ease.
ProRAW’s target audience
ProRaw is not something you would need for daily use. However, if you find yourself in situations which have tricky light or you want to make large prints of photographs, it would be best to go with ProRAW. When your camera produces jpegs, you’d better like the choices it made, because there are limitations to what you can do with them in editing. ProRAW, on the other hand, allows more control and is for anyone who likes that flexibility in their editing process.
Democratising smartphone photography
The arrival of digital cameras and the smartphone cameras has made photography accessible to everyone. We have seen an exponential growth in the number of users in the last 10 years. Photography is the most widely spoken and understood (also misunderstood) language in the world today. We converse every day through our pictures. It’s not a surprise that everyone wants to improve their photography skills and take better pictures. There have always been some limitations with smartphone photography when compared to digital cameras. However, that gap is closing down fast. ProRAW breaks the barrier once again and helps the end user develop photographs that one could just dream of a couple of years back. Apple has played a big role as a market leader in democratising smartphone photography.
When to shoot in ProRAW and when not to
ProRaw is not required for daily use or selfies (although you can). Use it in tricky light situations or against the light as much as possible. Use it when you need versatility in post production. Jpegs and Heic will still remain the most used formats.
How to access ProRAW
- To set up Apple ProRAW on iPhone 12 Pro and iPhone 12 Pro Max, go to Settings > Camera > Formats, then turn on Apple ProRAW.
- Open Camera, then tap the Raw Off button to turn ProRAW on.
- Take your shot.
- As you shoot, you can toggle between the Raw On button and the Raw Off button to turn ProRAW on and off.
ProRAW TIPS & TRICKS from Rohit

Rohit Vohra
- First tip would be to start using the ProRAW format for indoor shots. Than edit them on Lightroom and see the difference.
- Experiment. ProRAW gives you more creative control, so play with white balance, exposure and colour saturation.
- ProRAW is perfect for on-the-beach photos, especially when you find yourself taking pictures against the sun. Use it for landscapes or cityscapes.
- ProRaw files are much bigger in size so you will need that extra space, use it wisely.
- Focus on framing and composition.


